

Expert tips for optimal performance
Clear vision is key to winning races and your drone’s camera is responsible for everything you see in your goggles, so it makes sense to optimize it for a clear vision of the course. While most cameras come well tuned from the factory, you can adjust them
for your racing conditions. Let’s see how that is done.
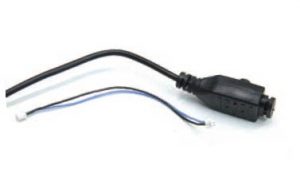
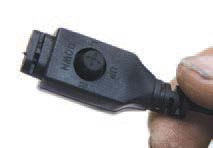
1. The camera menu controller and extension cable are two items included in most camera packages, but many pilots just set them aside. Well, after reading this, you won’t do that again!
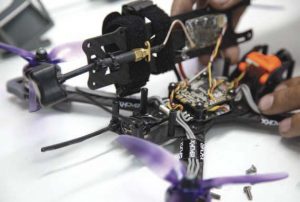
2. Start by removing the top plate so that you can access the camera and have some room to plug in the wire from the controller. In most cases, there four to
six bolts that hold down that plate. After you remove
the top plate, set it to the side so that you can access the camera. Keep all wires attached.
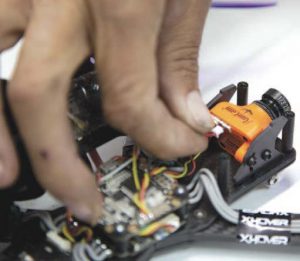
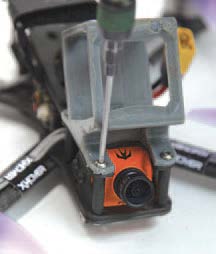
3. Plug in the camera menu controller to the upper right port on the back of the camera, as you see here. Right about now you are probably thinking, “So that’s what that little device is for!”
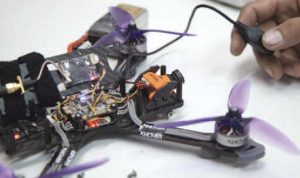
4. Plug in the battery; if you didn’t unplug anything while removing the top plate, everything should turn on and you will have use of the camera. Look through your goggles and use the joystick on the controller to navigate through the camera menu that’s on the screen. The joystick can go left, right, up, and down to navigate through the menus. Press down to select the highlighted menu and go into the submenus.
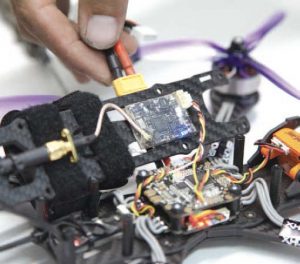
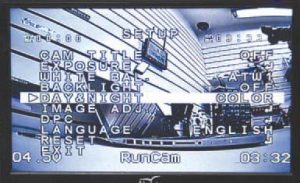
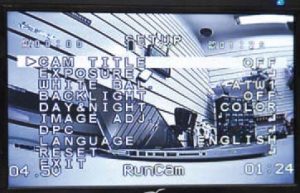 5 I used a monitor to track the camera settings. As you can see, I can change the camera title, exposure, white balance, backlight, day and night view, image adjustment, DPC (dead pixel correction), and language. The first thing to do is set up a camera title, which is a name for the bottom of the screen.
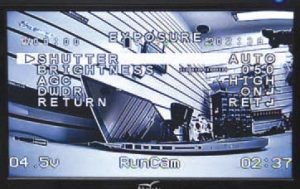 6. Moving to the exposure settings, first make sure the WDR (wide dynamic range) is on so that you can see detail in the shadows as well as the highlights. (The range can also be adjusted inside a submenu.) You can leave the shutter on Auto and adjust the brightness to suit your environment.
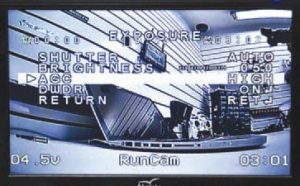
7. The AGC (automatic gain control) can be set to High or Low. Experiment with the settings in the area in which you are flying to see what works best for you. The 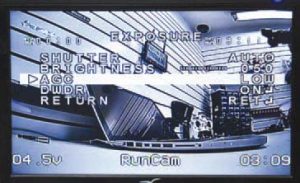 setting you choose will depend on whether you are flying during the day or night.
8. Day & Night is normally on Auto. But if you are in an area where the drone flies in and out of the dark, it could switch between black-and-white and color and mess with your view. Switch it to Color, or if you are flying at night, switch it to Black-and-White.
Final Thoughts
While this only touches the surface of all the controls that are available to you, you will want to adjust them while you are out in the field. This is where that little two-wire extension plug comes in. Plug it in and route it to the side of the quad so that it is easy to plug in the controller without having to remove the top plate. Now replace the top plate and get out there and enjoy your new flying view.